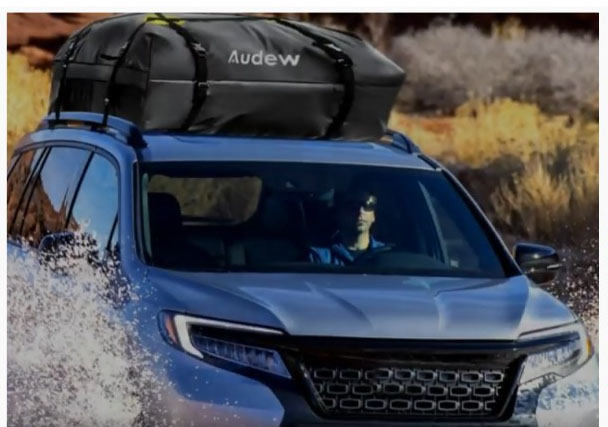
Roof bags are a very good way to safely pack your load on your vehicle while you are embarking on a journey. They will help you to be able to carry your load without you discomforting your passengers. That is what the roof bag does.
One of the major questions people ask is can a roof bag be installed in the rain? The answer to the question is that roof bags can be installed in the rain. This is possible is because the roof bags can be protected using a roof cover, and you can also protect yourself using an umbrella, your luggage can also be protected by using a cover.
When you cover yourself and the roof bag while you install it in the rain, it does not get destroyed, it will not get damaged by the rain.
In other words, the roof bags are 100% water-resistant, so it is an added advantage, they can be installed in the rain comfortably without worrying about if the roof bag will survive it or not.
One thing that travelers want is that they always want to be able to install their roof bags in the rain, and this is very possible with the kind of roof bags that are being made these days, they are 100% water-resistant and would not be destroyed by rain or water.
Do not think you just go ahead to install your roof bag in the rain without going through the right process. To get the best results while installing a roof bag in the rain, what you need to do is to take note of these procedures.
This will help you to avoid some mistakes and know the exact thing you need to do while you are installing the roof bag in the rain.
How to Install a Roof Bag in the rain
Let your rooftop be free of dirt
Installing a roof bag in the rain is quite different when it is not raining. When it is raining, what you should do first is to get a rain cover for yourself, the roof bag, and your luggage.
When you have got that you should make sure the rooftop is free from dirt. Make sure that there is no form of dirt when you are installing the roof bag.
If there is dirt on the rooftop of the vehicle, it could disturb the anti-slip mat and could also cause some scratch on the top of the vehicle.
Use an anti-Sleep Mat or Pad for the rooftop
The next thing you need to do is to put the anti-slip mat or pad on the rooftop. It is important that you place the anti-slip mat before placing the roof bag, this is because the anti-slip mat helps to prevent the roof bag from slipping off the roof while you are driving.
It will also help to prevent scratching on the rooftop of the vehicle. When you buy cargo bags, some of them usually come with an anti-slip mat, while some do not come with it.
This mat should not be neglected. If the cargo bag you bought does not come with an anti-slip mat, what you need to do is to get yours asap.
You should not install the roof bag if you do not have your anti-slip mat so that your vehicle is not exposed to scratch and you do not risk the roof bag slipping off the roof of your vehicle when you are driving.
Load your items carefully
The next thing you need to do is to load your luggage into the carrier. It is important to place the items that have sharper edges in the middle of the bag, and then the ones with softer edges can be placed around the bag.
The aim of doing this is to prevent the items with sharper edges from puncturing the sides of the roof bag, when sharp items puncture the edge of the roof bag it could cause some more damage to it.
Close the zipper of your roof bag properly
While you are filling the carrier, the next thing to do is that you should start closing the zipper from the front to the rear.

Make sure you fold the protective flap down so that you can secure the hook – and loop – closures.
Connect the compression straps buckles and then tighten all the compression straps. You tighten it by pulling the strap ends against the bag content.
The number of compression straps that a roof bag has depends on how big it is. Those of 15 feet cubic has four compression straps, while those of 20 feet cubic has six compression straps.
Why this compression strap is important is because it helps in compressing the roof bag when you have placed your luggage inside of it.
Finally, you should make use of the extra straps that usually come with the roof bag to thread them under the side buckles and the side rails, then you should close the buckles.

You should tie the end of the strap so that they do not flap in the wind. If you still have more straps you should repeat the same process for all of them.
The number of straps a roof bag has depends on the brand itself, some brands of roof bags have more straps than the other.
The more the straps, the better the chances of the roof bag being stable and strong on the roof of the vehicle.
Conclusion
We have made it clear at the beginning of this article that a roof bag can be installed in the rain, and this possible because you can cover yourself, the roof bag, and your luggage.
The waterproof feature of the roof bag is also an added advantage. Some roof bags out there claim to be water-resistant, but not all of them are really water-resistant.
Installing a roof bag when there is no rain is quite different from installing the roof bag when there is rain. When you follow these steps diligently, you will be able to successfully install your roof bag in the rain.
We also made it known that when you are installing the roof bag in the rain, a rain cover will come in handy, to help make the installation process easy for you while it is raining.
If you follow the steps we listed above, you find it easy to install the roof bag in the rain.